
Module 2: Using the Petrographic Microscope
2.5 Common Issues Using a Petrographic Microscope
Elizabeth A. Johnson; Juhong Christie Liu; and Mark Peale
Even after you learn about the parts and operation of a petrographic microscope, problems will arise as you work with a microscope on a day-to-day basis. This is especially true if there are multiple users of the same microscope. Someone in a different class, or who is doing a different type of research project, might adjust the settings to be different from the way you are using the microscope. Or, it might be necessary for you to look at different types of samples and adjust the microscope accordingly.
It is said that the way to most thoroughly understand a piece of equipment is to fix it when it does not work. This does not mean you should intentionally break a microscope! However, you will gain expert knowledge of how the microscope works if you carefully and logically attempt to solve an issue yourself, without further “messing up” the equipment.
In this module, we explore ways to troubleshoot common issues that may arise while using a petrographic microscope.
Learning Objectives
Students will be able to:
- Create testable explanations for problems encountered while using a petrographic microscope.
- Create a flowchart or list of steps to take in order to diagnose common issues with using a petrographic microscope.
Prior Knowledge and Skills
Top 10 (-ish) reasons why your microscope isn’t working correctly
- The bottom polarizer is rotated out of its proper position (For example, on Leica student microscopes, 0 degrees should be aligned with the dot), or there is an accessory plate inserted into the microscope. These will create abnormal colors in crossed-polarized light- which is fine if you meant to do so with the accessory plate, and you realize it is there!
- One of the objectives or the condenser are misaligned. This rarely happens on good-quality microscopes that are regularly maintained. Misalignment often means that someone has been forceful in using the microscope resulting in the optics being thrown out of alignment.
- The nosepiece is not fully rotated so that an objective aligns with the substage condenser. This will produce an incomplete image.
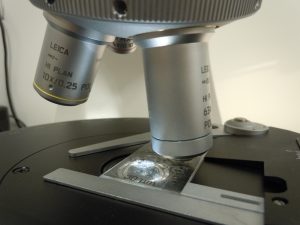
- The condenser settings are not appropriate for the objective lens you are using, or the purpose for which you are using the microscope. Check the magnification on the condenser aperture diaphragm.
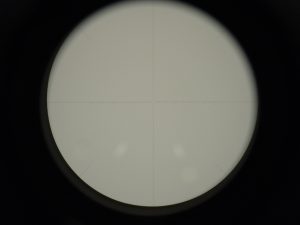
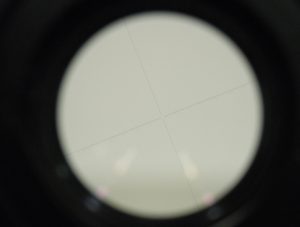
- The crosshairs are not vertical and horizontal in the field of view. The orientation of the crosshairs can be adjusted in the right eyepiece. Simply lift and rotate to the proper orientation.
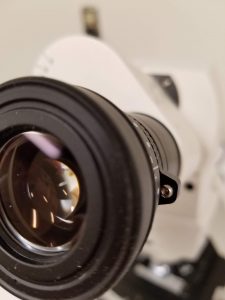
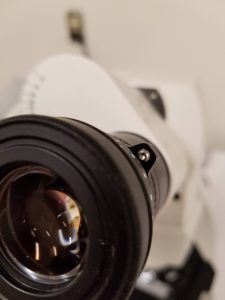
- One or both of the eyepieces are not focused for your eyes, or you are using a binocular microscope and you cannot see the entire field of view. Rotate the focus adjustments on the eyepieces themselves until you can see clearly. Most binocular microscopes have a way to adjust the distance between the eyepieces to fit your eyes. For many microscopes, gently pull the eyepiece tubes apart or push together gently until you can see the field of view out of both eyes.
- Something is in the way (or partially in the way) of the view.
- If the analyzer or an accessory plate is only partially inserted, part of the view will be obstructed or darkened.
- If the field diaphragm is closed too far for the chosen objective, a dark ring will block light on the outside of your field of view.
- If the Bertrand lens is in, but you are at low magnification, you will get a fuzzy view or a very constricted view of an optical interference figure.
- The illuminator is on its minimum setting, producing a dark or almost dark field of view. Rarely, a light bulb will burn out, but if the microscopes are regularly maintained, this rarely occurs.
- The electrical outlet has reset or the plug is not firmly attached to the microscope, resulting in a lack of power to the illuminator (or camera, if your microscope has one).
- This is a very common occurrence at my university because all the power outlets are the type that are typically used for hair dryers in a bathroom (they have ground fault circuit interrupters (GFCI)). Turn off the microscope power button, make sure the cord is firmly attached to the microscope and the plug is completely in the outlet, then push the “test” and “reset” buttons on the outlet. Try turning the microscope on again.
And the number one issue I see in my petrology course is…
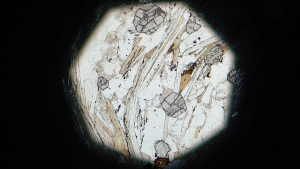
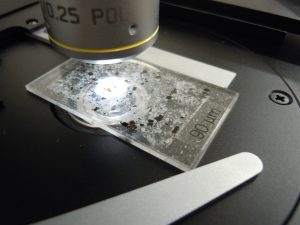
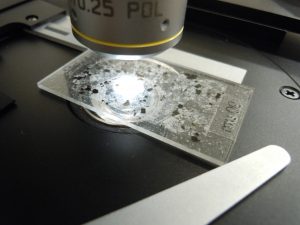
- The thin section is upside down. The thin slice of rock on the thin section should be on TOP of the glass slide. Remember that not all thin section labels will be on the top side of the thin section – this is especially true for thin sections used in research. At low magnification, for example when the 4x objective is used, the focal range of the objective can accommodate the height difference between having the rock slice above the glass, or the glass above the rock section. However, at higher magnifications the narrow focal region makes it necessary for the rock slice to sit on top of the glass slide to be focused.
Bonus issue
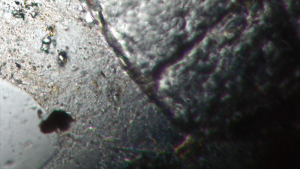
- Do you observe smudges or specks interfering with your view?
The microscope eyepieces, and perhaps the objective lenses, could be coated with dust or oils from human contact. Our microscopes are heavily used by multiple classes, so cleaning the eyepieces with an approved lens wipe on a regular basis is a good way to keep the field of view clear (and is also hygienic).
If the objective lens is indeed dirty, it is advisable to ask an instructor for help with cleaning. Make sure to use the correct type of lens wipe and cleaner and take care not to scratch the lens!
Color Blindness
Q: It doesn’t matter which microscope I use, I don’t see the colors of the minerals the same way that other people in the class are describing them.
A: It is possible you could have a type of color blindness. Color blindness is common, and can be tested online: https://www.aao.org/eye-health/diseases/how-color-blindness-is-tested. One of the test options is here: https://colormax.org/color-blind-test/
Do not be discouraged if you cannot see or can only partially distinguish some colors – many successful petrologists have partial or total color blindness, including the person who taught the Petrology course for 36 years at my university before I did. There are many observations which can be used to identify minerals using the petrographic microscope, and color tends to be among the least reliable. If you need help reading birefringence colors or interpreting accessory plate tests, please ask your instructor for help.
https://commons.wikimedia.org/wiki/File:Ishihara_compare_1.jpg

Guided Inquiry Exercises
Guided Inquiry
Question 2.5.1. Using your knowledge of the parts of a petrographic microscope and ways the microscope can be used incorrectly, create a flowchart diagram that would help you diagnose a problem with your microscope.
For each scenario described below, provide at least one testable explanation for the observation.
Question 2.5.2.
There is no light passing through the microscope.
Question 2.5.3.
It looks like something circular is partially blocking the field of view of the microscope.
Question 2.5.4.
The cross-polarized view of your thin section looks “funny”- the colors seem wrong for the minerals in the thin section.
Question 2.5.5.
The thin section is in focus at low magnification, but it is not possible to focus it at higher magnification.
Media Attributions
- Figure 2_5_1 © Elizabeth Johnson is licensed under a CC BY-SA (Attribution ShareAlike) license
- Figure 2_5_2A © Elizabeth Johnson is licensed under a CC BY-SA (Attribution ShareAlike) license
- Figure 2_5_2B © Elizabeth Johnson is licensed under a CC BY-SA (Attribution ShareAlike) license
- Figure 2_5_2C © Elizabeth Johnson is licensed under a CC BY-SA (Attribution ShareAlike) license
- Figure 2_5_2D © Elizabeth Johnson is licensed under a CC BY-SA (Attribution ShareAlike) license
- Figure 4_3_3A © Elizabeth Johnson is licensed under a CC BY-SA (Attribution ShareAlike) license
- Figure 4_4_3B © Elizabeth Johnson is licensed under a CC BY-SA (Attribution ShareAlike) license
- Figure 2_5_4A © Elizabeth Johnson is licensed under a CC BY-SA (Attribution ShareAlike) license
- Figure 2_5_4B © Elizabeth Johnson is licensed under a CC BY-SA (Attribution ShareAlike) license
