
9 Getting Started
Frances Davis and Wally Baumback
Learning Outcomes
When you have completed this module, you will be able to:
- Download and install Inventor software.
- Configure Inventor.
- Download support files.
Accessing Inventor Software
When you reach the Inventor portion of the course, you will receive an email from Autodesk asking you to sign up for an account. You must use your VCCS email to sign up for the account.
Note that the process of setting up Inventor on your computer may take 1-2 hours.
To download the software after setting up your account,
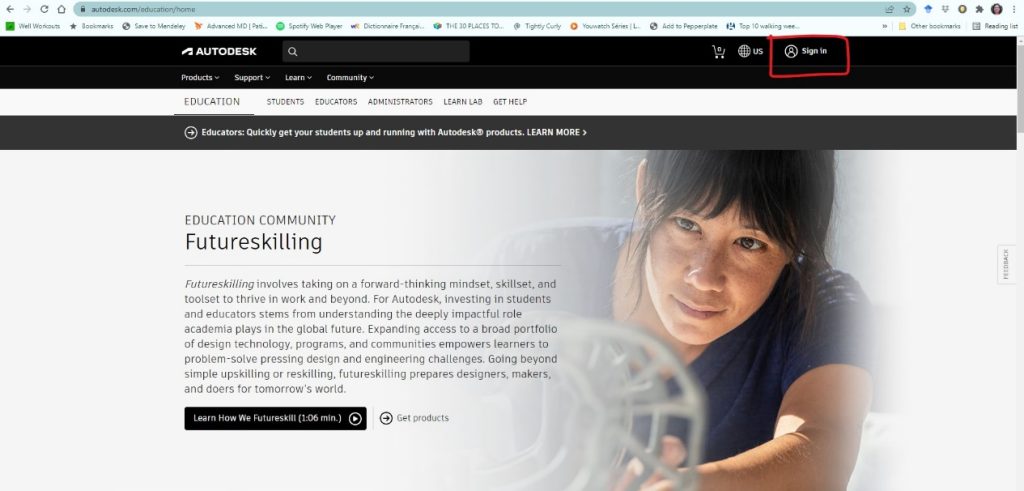
- Go to Autodesk Education. Click the sign in button at the top of the page.
- Sign in using your VCCS email and password that you set up for your Autodesk account. If you have not setup your Autodesk account, after you input your email you will be prompted to finish setting up the account.
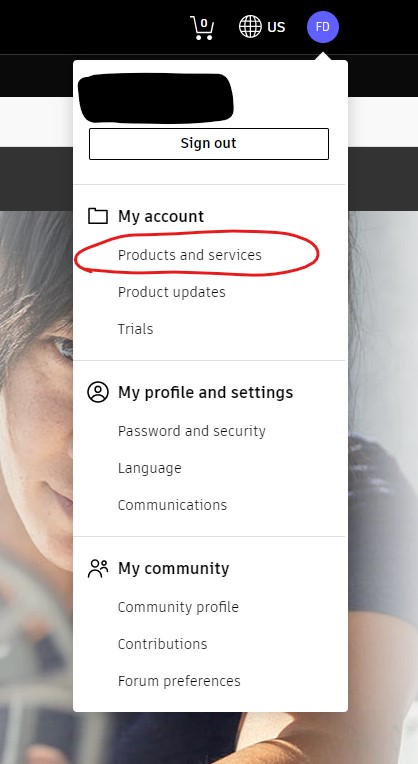
- Select the icon at the top of the page with your initials. A drop-down menu will appear, then select products and services. Note that the figure below shows my initials!
- Download Autodesk Inventor Professional 202X. (Check in class to verify the version we are using.) The download is approximately 13 GB.
Set up software (Complete if you are using your personal computer.)
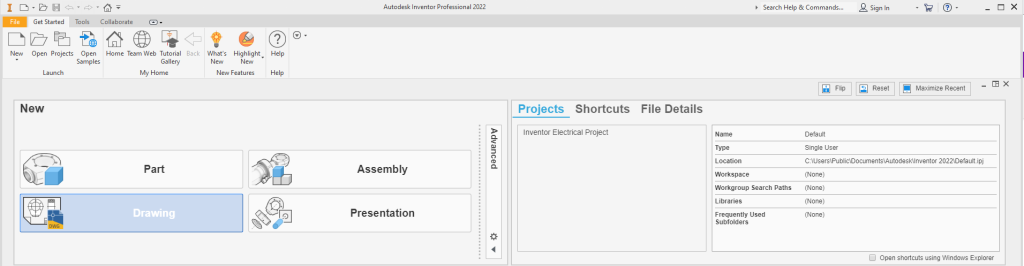
- Start Inventor. Your screen should appear similar to the figure. If any additional dialog boxes or windows open, close them.
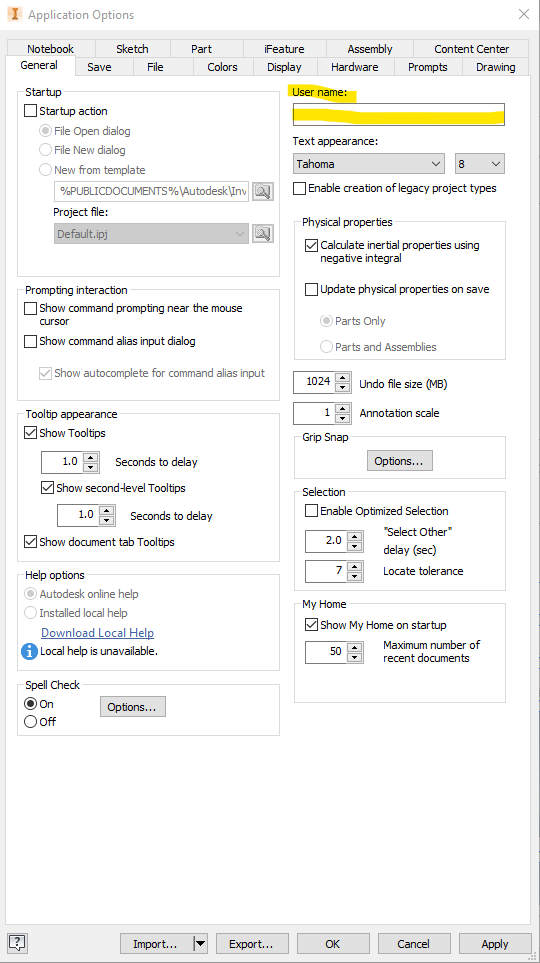
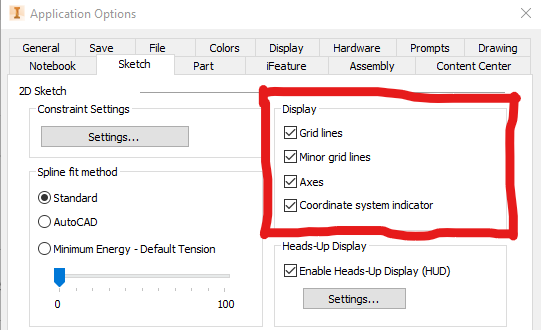
- Click the Tools tab at the top of the window. Click the Application Options icon as shown below. This will open the Application Options dialogue box.

- Under the general tab, update your user name to be your first initial and last name. As an example, for Bob Smith it would say B. Smith.
- Select the sketch tab, under display check all boxes.
- If you want to change the action performed by the middle mouse button, select display and update the settings for middle mouse button.
- If you want to change the color scheme used go to the colors tab.
- Select apply.
- If you are on your own computer these changes will be saved. If you are working on a shared computer it might be useful to save export these settings. You are unlikely to get the same computer every time and this gives you an easy way to upload your settings.
- Select okay.
Download support files
Download the Inventor files that will be used in this course and place them in them in a folder.
Viewing Sketches and Parts
Inventor is a tool for building three-dimensional models of objects. When viewing a part in Inventor there are two different modes: Sketch mode and the Model mode. In Sketch mode, you are viewing and working on a two-dimensional plane. The Sketch mode is used to create and edit 2D sketches that are then extruded or revolved to create 3D solid models. The Model mode, you are viewing and working in three dimensions the same way the human eye sees real objects. In Model mode is used to view, manipulate and modify 3D solid models. You can switch between these two modes to construct or edit and create the solid model.
Navigation
Zooming is the process of changing the viewable size of the sketch or model to make it appear either smaller or larger.
Panning is the process of sliding the sketch or model around in the Graphic window.
Orbiting is the process of changing the orientation of the sketch or model.
The Home view is the viewing position of the sketch or model to a known isometric view.
Each of these controls can be accessed in multiple ways.
The Mouse
Left Button: This is the pick button. Use it to pick objects, pick menu items, or select locations on the sketch or model.
Middle Button: The middle button or the wheel is used to zoom and pan around the Graphic window. Recall that you can setup either CTRL+MMB or SHIFT+ MMB to orbit.
Right Button: The right button displays the Right-click menu. The Right-click menu will change depending on the current command or operation being preformed.
View Tab
Select the view tab. On the far right you will see a Navigate section that also allows you to perform the same functions.
On Screen Menu
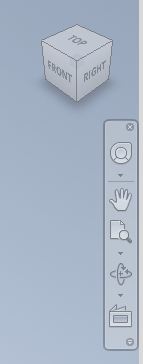
Home View: Running your mouse over the box will bring up a picture of a home selecting it will send you to the home view.
Full Navigational Wheel: Can access Zoom, Orbit, Pan and Rewind
Pan
Zoom All: Adjust Zoom so that the entire part fits in the screen
Orbit
Look At: Looks at a specific surface on the body
Inventor Files
A file can be a 3D solid model (called a part), an assembly, a presentation, or a drawing created in Inventor and saved in digital format. Each of the file types has a different extension.
Parts
A part file is a 3D solid model and has the file extension .ipt. A part file can be used on its own, used to create a working drawing, used as part of an assembly file, or used as part of a presentation file.
Model Tree
The model tree includes a sequential record of all the steps performed to create a part. The features (3D builds) and sketches (2D drawings) used to build a part can be accessed from the model tree. By clicking on + sign beside a feature you can see the sketch used to build the part.
Use the open button shown on the getting started tab to open the Ch1_Workalong_01.ipt. Use the different techniques described to examine the part.
