13 More Part Building Basics
Frances Davis and Wally Baumback
Learning Outcomes
When you have completed this module, you will be able to:
- Change the view style.
- Change the unit system.
- Use parametric dimensions.
- How to use fillet and chamfer.
- Use the shell command.
Jump to section links
Changing Viewing Styles
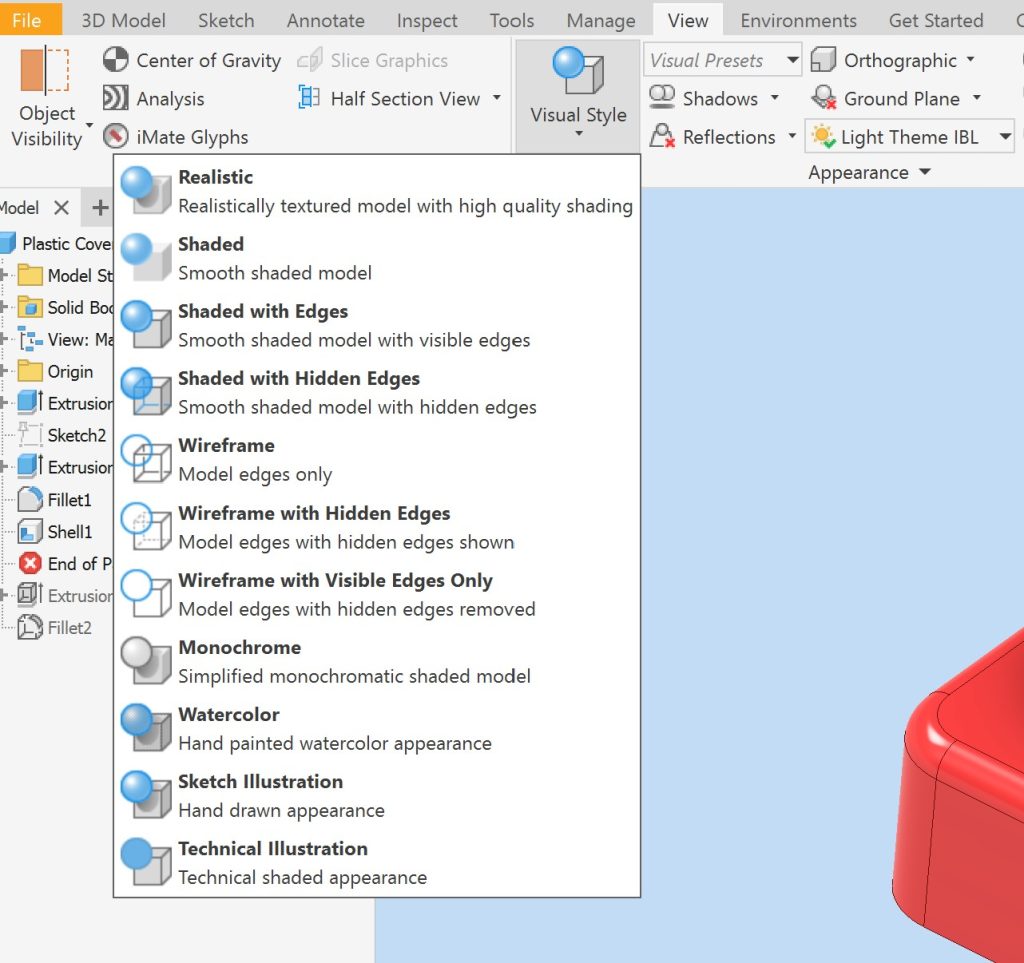
Often times when viewing a model it will be easier to see what is happening if you change the visual style. This can be found under View, Visual Styles. If you need to see inside a part, the wireframe views are often used.
Changing Unit Systems
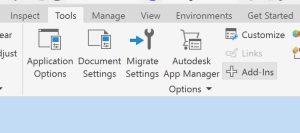
If you start building a part a notice that you have used the wrong template file, you can change the unit system by going to Tools, Document Settings. Then selecting the units tab in the dialog. In this dialog box you can also change the precision of the dimensions that are displayed in the sketch.

Parametric Dimensions
Parametric dimensions allow you to determine the value of a dimension using an equation. To create a parametric dimension you can either type the variable name in the equation as show below: width/ 2 or click on the dimension you want to use and the value will appear in the equation.
If you want to name a dimension when you create it, instead of just typing in the value you type: width = 5.

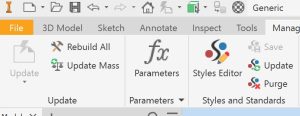
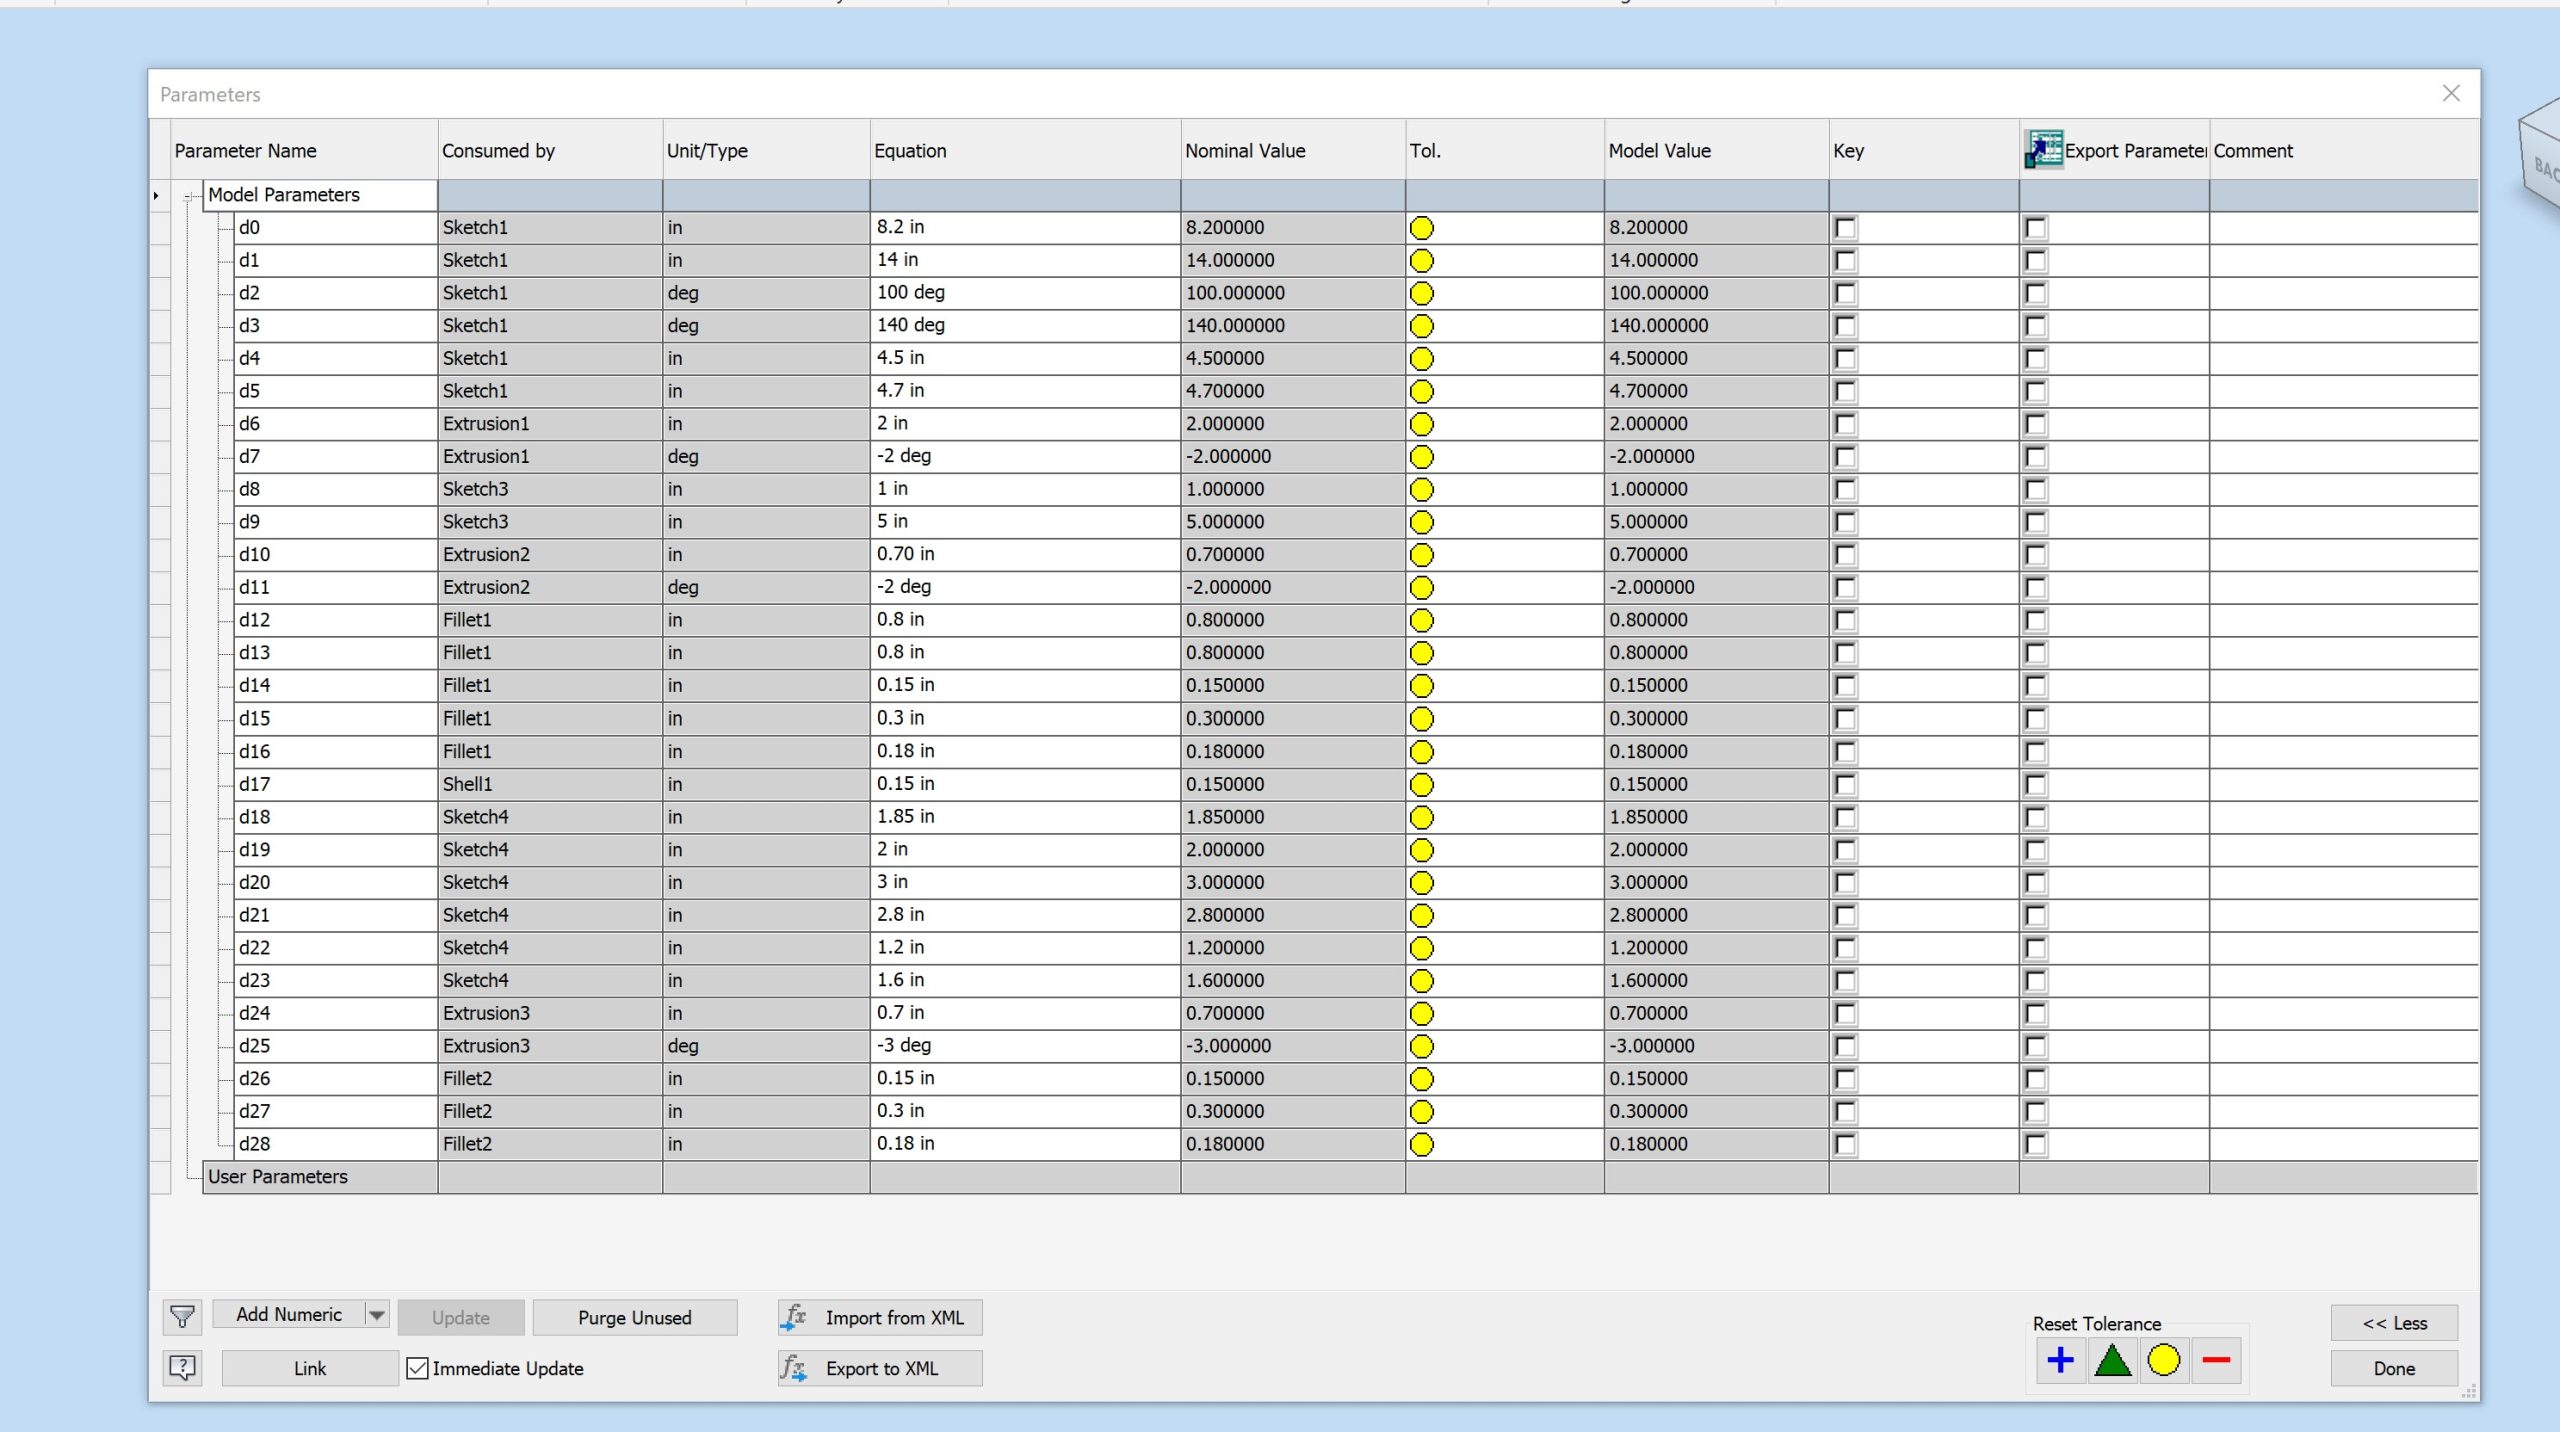
If you want to see all of the dimensions active in your part file you can go to Manage, Parameters. This will open a dialog box listing the names and values for all parameters in the part. For parametric dimensions it will show the equation also.
Fillet and Chamfer
A fillet is simply an arc which is tangent at both ends. Fillets are inserted using the features command at the end of the part. A chamfer is similar to a fillet except instead of an arc being inserted, it inserts an inclined line. The figure below shows compares what a fillet and a chamfer look like on the edges of a part.
 |
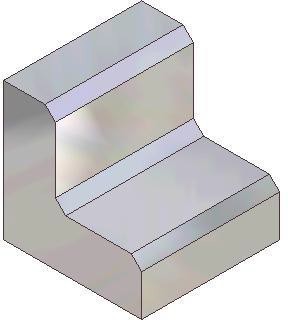 |
| Part with fillet applied to the edges | Part with chamfers applied to the edges |
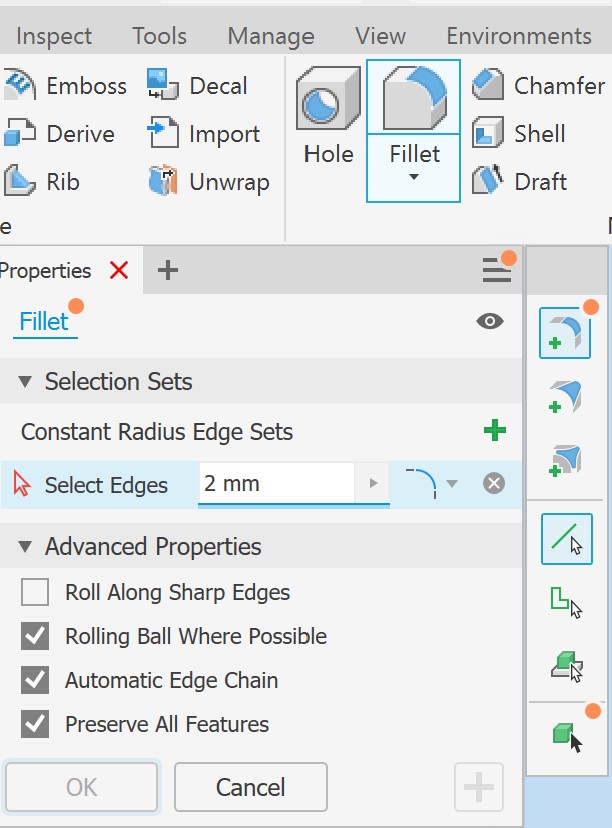
Inventor Command: FILLET and CHAMFER
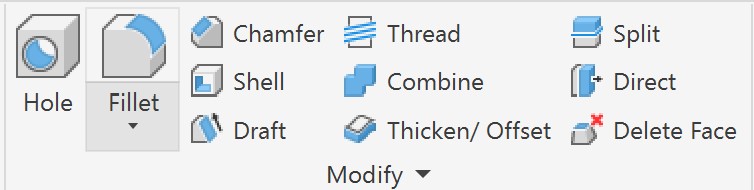
The table below shows different ways of dimensioning fillets and chamfers along with the corresponding dialog box selections when using the command.
| Type | Drawing | Dialog Box |
| Fillet |  |
 |
| Chamfer |  |
 |
Workalong
This workalong example uses the shell command to build a piston.
| Part Basics Workalong 01 | ||
| Part Name: Piston | Project: Inventor Course | Units: Inches |
| Template: Standard (in).ipt | Color: N/A | Material: N/A |
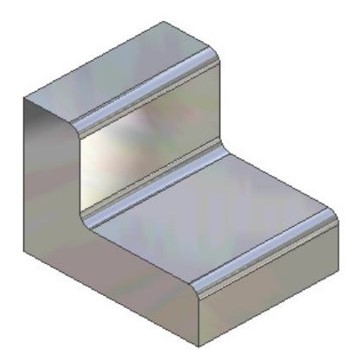
This workalong example explores inclined planes and angular dimensions.
| Part Basics Workalong 02 | ||
| Part Name: PartBasics02 | Project: | Units: Inches |
| Template: Standard (in).ipt | Color: Orange | Material: Generic |
|
Step 1 Start a new part file with the template and filename shown above. Step 2 Follow along with the video to create the part shown below.
|
||
Exercises
| Practice Exercise 4-1 | Time Allowed: 45 Min. | |
| Part Name: Inventor_Ch4E01 | Project: Inventor Course | Units: Inches |
| Template: Standard (in).ipt | Color: Chrome – Polished | Material: N/A |
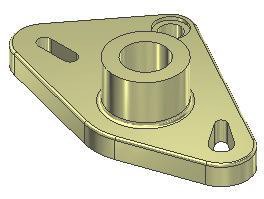
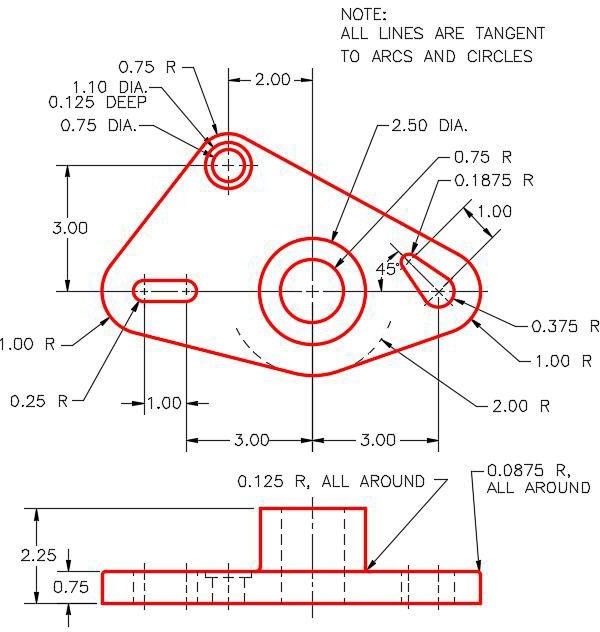
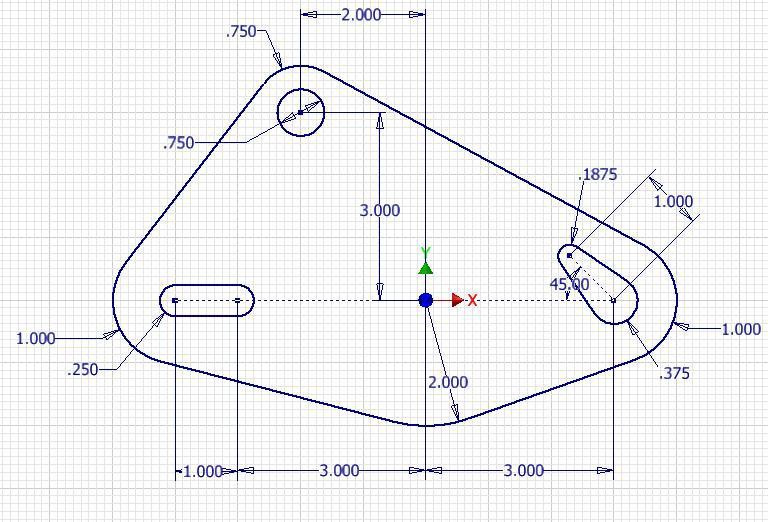
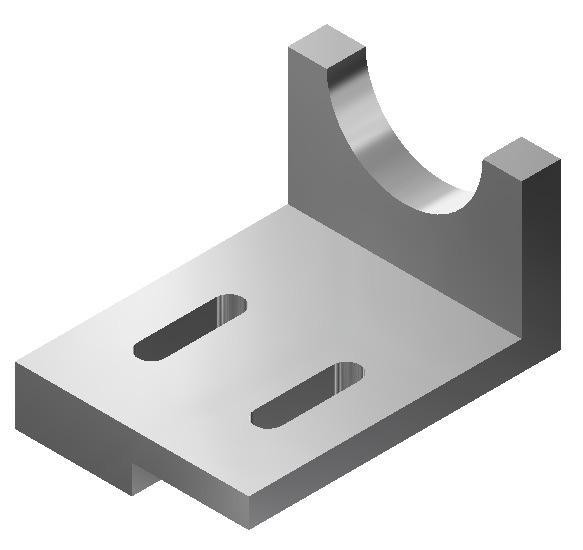
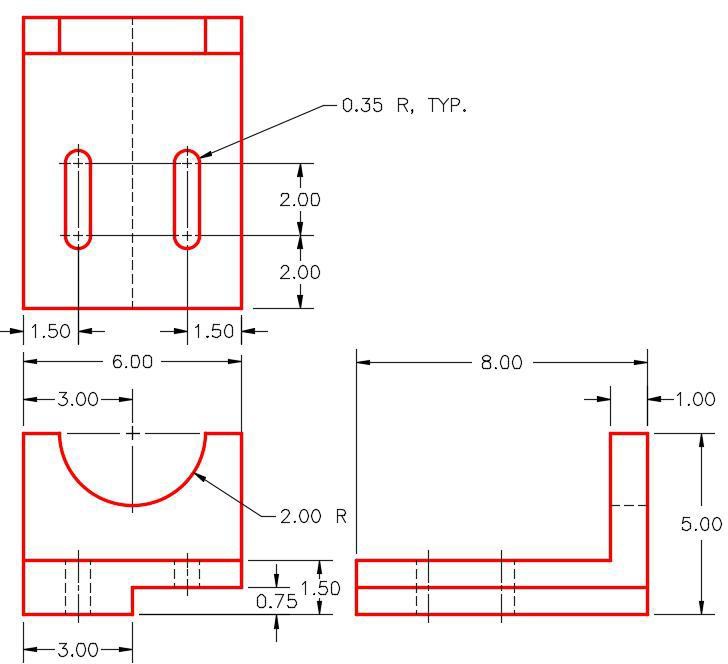
| Draw the necessary sketches and extrude or revolve them to produce the solid model shown below. Apply all of the necessary geometrical and dimensional constraints to maintain the objects shape and size. Create all fillets after the solid model is totally constructed.
|
||
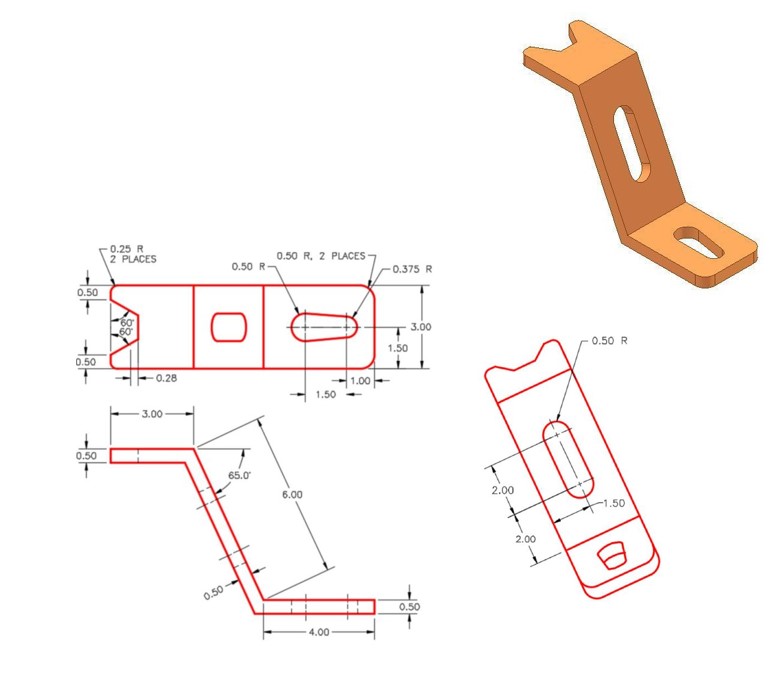
| Practice Exercise 4-2 | Time Allowed: 45 Min. | |
| Part Name: Inventor_Ch4E02 | Project: | Units: mm |
| Template: Standard (mm).ipt | Color: Copper – Satin | Material: N/A |
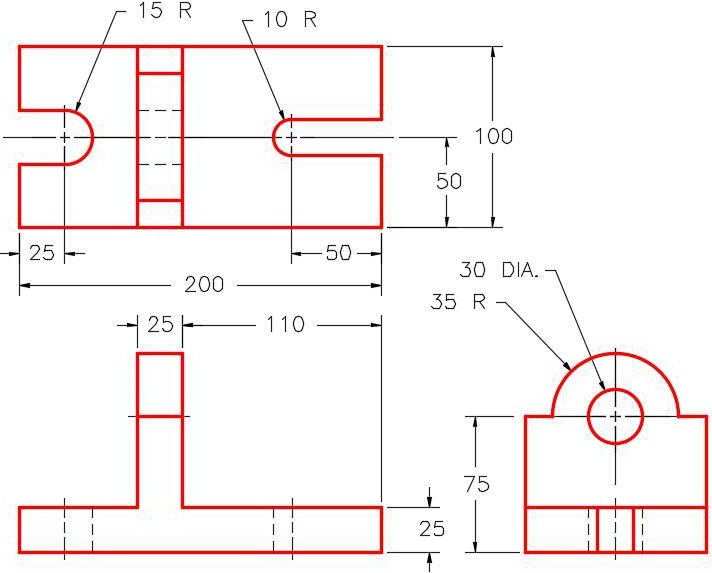
| Draw the necessary sketches and extrude or revolve them to produce the solid model shown below. Apply all of the necessary geometrical and dimensional constraints to maintain the objects shape and size. Create all fillets after the solid model is totally constructed.
|
||

| Practice Exercise 4-3 | Time Allowed: 60 Min. | |
| Part Name: Inventor_Ch4E03 | Project: Inventor Course | Units: Inches |
| Template: Standard (in).ipt | Color: Nickel | Material: N/A |
|
Draw the necessary sketches and extrude or revolve them to produce the solid model shown below. Apply all of the necessary geometrical and dimensional constraints to maintain the objects shape and size. Create all fillets after the solid model is totally constructed.
|
||