12 Revolve
Frances Davis and Wally Baumback
Learning Outcomes
When you have completed this module, you will be able to:
- Draw and dimension a sketch that uses a centerline
- Use revolve to create circular parts.
- Use circular pattern repeat to create hole patterns.
Jump to section links
Solids of Revolution
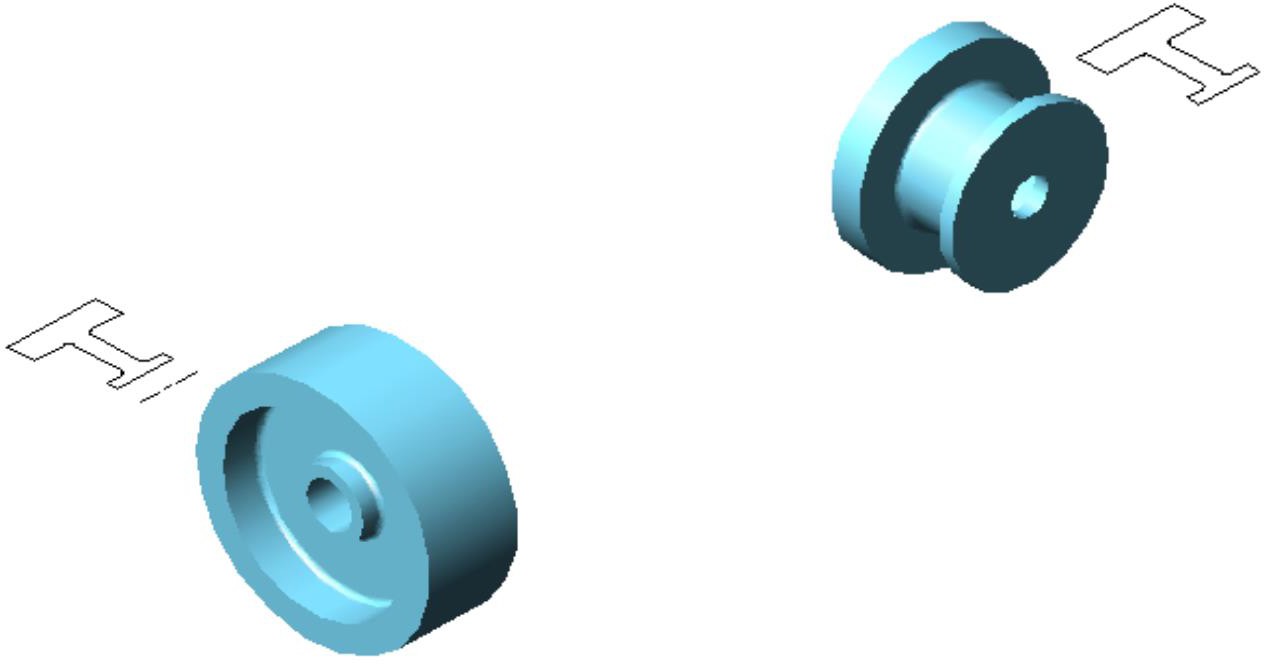
When building symmetric objects, it is much easier to create the model by revolving the Base sketch around an axis rather then extruding it. The axis, which can be one of the lines in the sketch, a centerline, or one the three primary axes must always be located in the center of the model. The sketch can be revolved any angle between 0 and 360 degrees. The picture below shows the impact selecting different axes to revolve around using the same sketch.
Revolve
Inventor Command: REVOLVE
The REVOLVE command creates a 3D solid of revolution using the revolve feature. You must select an axis to revolve about and a cross-section to revolve.
Circular Repeat
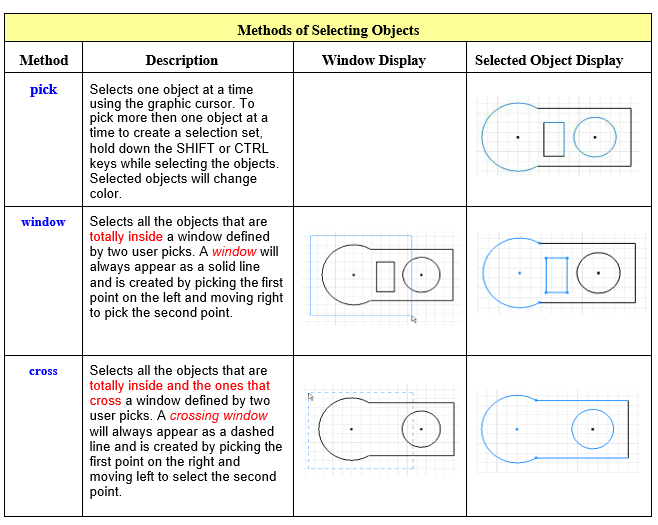
Often bolts are placed an a bolt circle. Rather than build each hole using the hole tool, it is more convenient to use the circular repeat feature. This allows you to select a circular path, the feature(s) you want to repeat, and a number of repetitions to produce a part. The different techniques shown below for selecting objects in a drawing can be useful when performing the circular repeat command when sketching.
Inventor Command: CIRCULAR REPEAT (SKETCH)

Inventor Command: CIRCULAR REPEAT (FEATURES)

This workalong uses
- revolve using a centerline
- dimension with a centerline
- extrude cut
- circular repeat
| Revolve Workalong1 | ||
| Part Name: RevolveWorkalong1 | Project: | Units: Inches |
| Template: Standard (in).ipt | Color: Cadet Blue | Material: Nylon 6/6 |
|
Step 1 Start a new part file with the template and filename shown above. Step 2 Use the video below to follow along and create the part.
|
||

Revolve Workalong2
This workalong uses
- revolve using a centerline
- revolve using an axis
- dimensioning with a centerline
- project geometry
- angular dimensions
- changing view styles
- circular repeat feature
- construction lines
| Revolve Workalong 2 | ||
| Part Name: RevolveWorkalong2 | Project: Inventor Course | Units: Millimeter |
| Template: Standard (mm).ipt | Color: N/A | Material: N/A |
|
Step 1 Start a new part file with the template and filename shown above. Step 2 Use the video below to follow along and create the part.
|
||
Exercises
| Revolve Exercise 1 | Time Allowed: 30 Min. | |
| Part Name: Inventor_Ch3E01 | Project: | Units: Inches |
| Template: Standard (in).ipt | Color: N/A | Material: N/A |
|
Step 1 Start a new part file with the template and filename shown above. Step 2 Draw the sketch shown below. Apply all of the necessary geometric and dimensional constraints to fully constrain the sketch.
Step 3 Revolve the part.
|
||
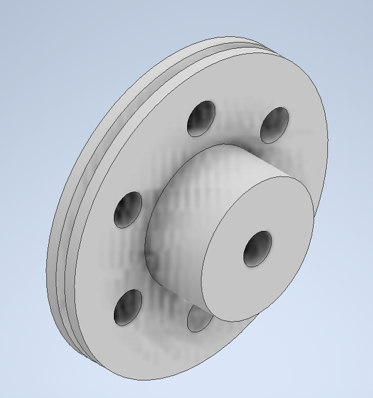
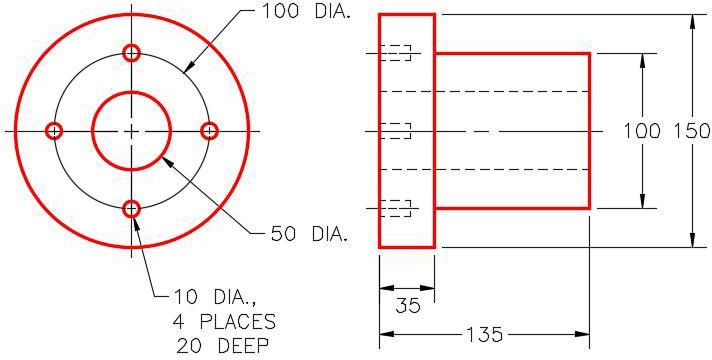
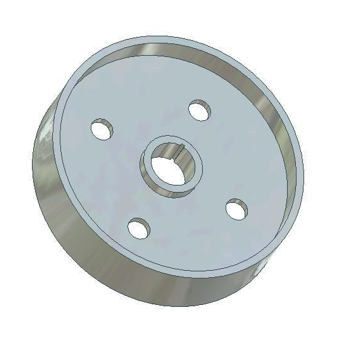
| Revolve Exercise 2 | Time Allowed: 30 Min. | |
| Part Name: Inventor_Ch3E02 | Project: | Units: Millimeter |
| Template: Standard (mm).ipt | Color: Aluminum – Flat | Material: N/A |
|
Step 1 Start a new part file with the template and filename shown above. Step 2 Draw the necessary sketches and use revolve and circular repeat to produce the solid model shown below. Apply all of the necessary geometric and dimensional constraints to fully constrain all sketches. Step 3 Apply the color shown above. Hint: The small holes do NOT go all the way through the flange.
|
||
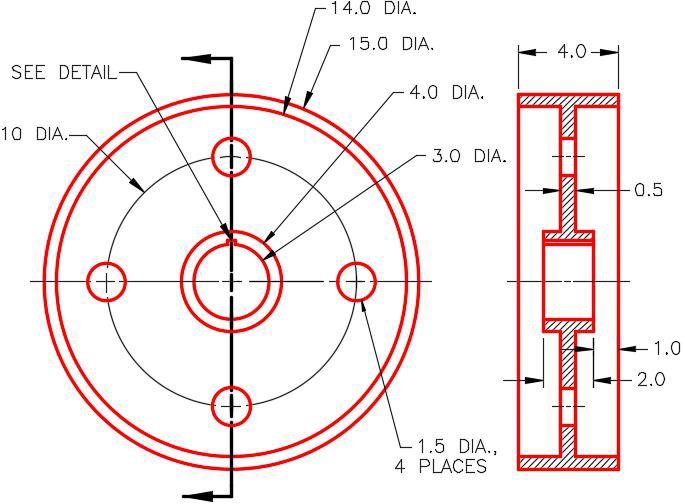
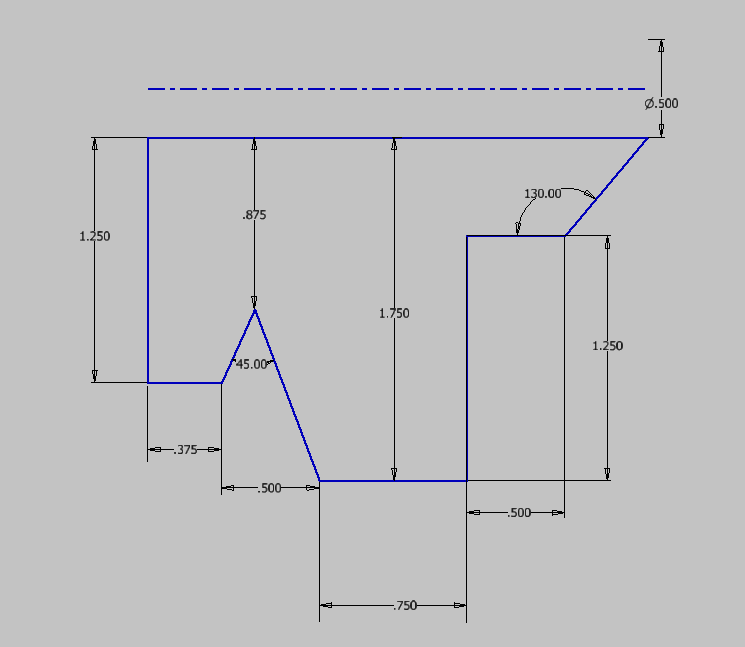
| Revolve Exercise 3 | Time Allowed: 60 Min. | |
| Part Name: Inventor_Ch3E03 | Project: | Units: Inches |
| Template: Standard (in).ipt | Color: Zinc | Material: N/A |
Step 1 Draw a centerline that the sketch will be revolved around. Mark it as a centerline. Step 2 Draw the Base sketch and revolve. Apply the necessary geometric and dimensional constraints to fully constrain the sketch.
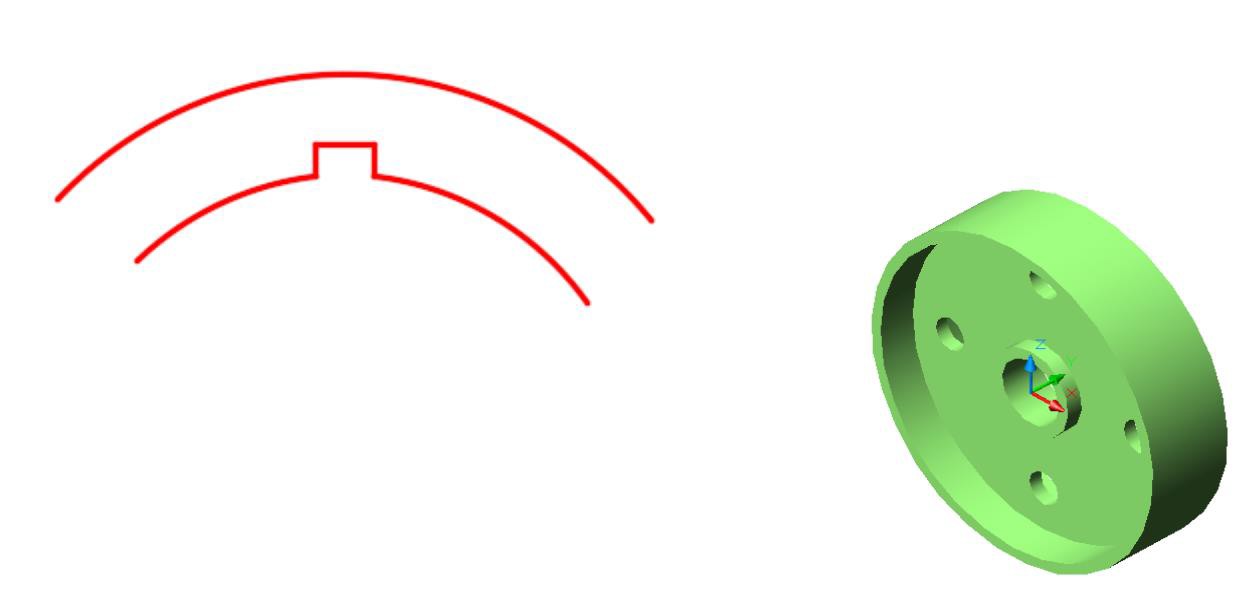
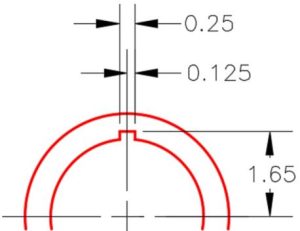
Step 3 Add the notch shown in the detailed drawing. Notice that the notch is flat on top. Apply the necessary geometric and dimensional constraints to fully the sketch.
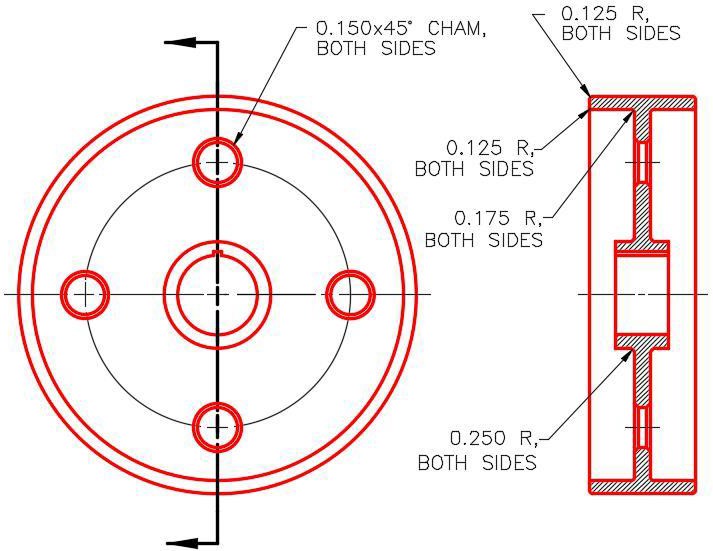
Step 4 Add the one small hole and use the circular repeat tool to place the remaining 3 holes. Step 5Add the chamfers and fillets described below to the part.
|
||